
Table of Contents
Navigating the renovation’s emotional highs and lows reveals a compelling shift towards embracing creative problem-solving within design constraints.
Transforming Underwhelming Spaces: A Basement Bathroom Renovation Journey
After a month of planning and discussions, we finally decided to tackle the basement bathroom renovation—an essential step following our kitchen makeover. The bathroom was in dire need of improvement, and the transformation was long overdue. Trust me when I say it was genuinely horrendous. Now, let’s dive into the details of this exciting project and explore the inspiration behind our decisions!

Source: Emily Seeds Interiors
Decisions, Decisions: Floor Tiles and Space Layout
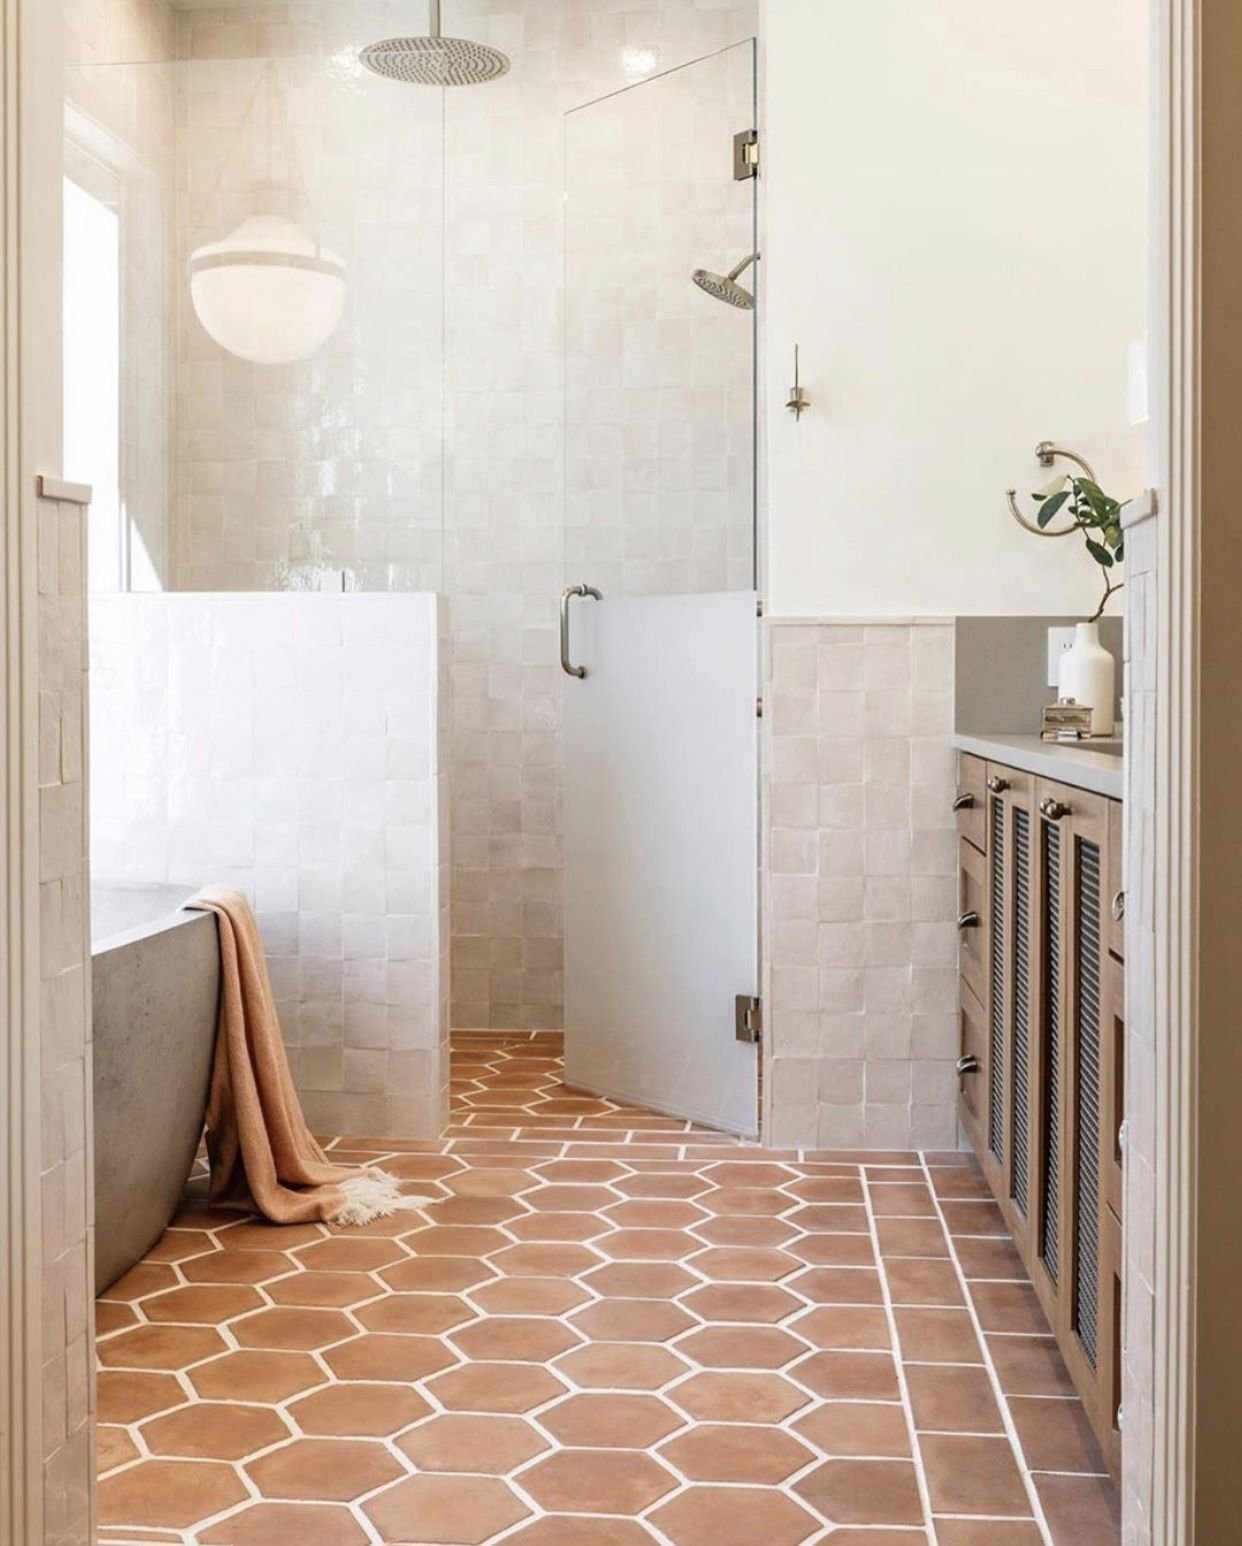
When we finally took the plunge to renovate the basement bathroom, the project swiftly became a puzzle of creative thinking. Although small, the space had its challenges with a layout that included various jutting elements. The first major decision was whether to retain the existing Saltillo tile floor. My initial instinct was to replace it with something fresher; however, budget constraints prevented that. Ultimately, we decided to keep the tile and focus on updating other aspects of the bathroom instead. Planning a remodel often feels like a game of chess, with each move impacting the next.
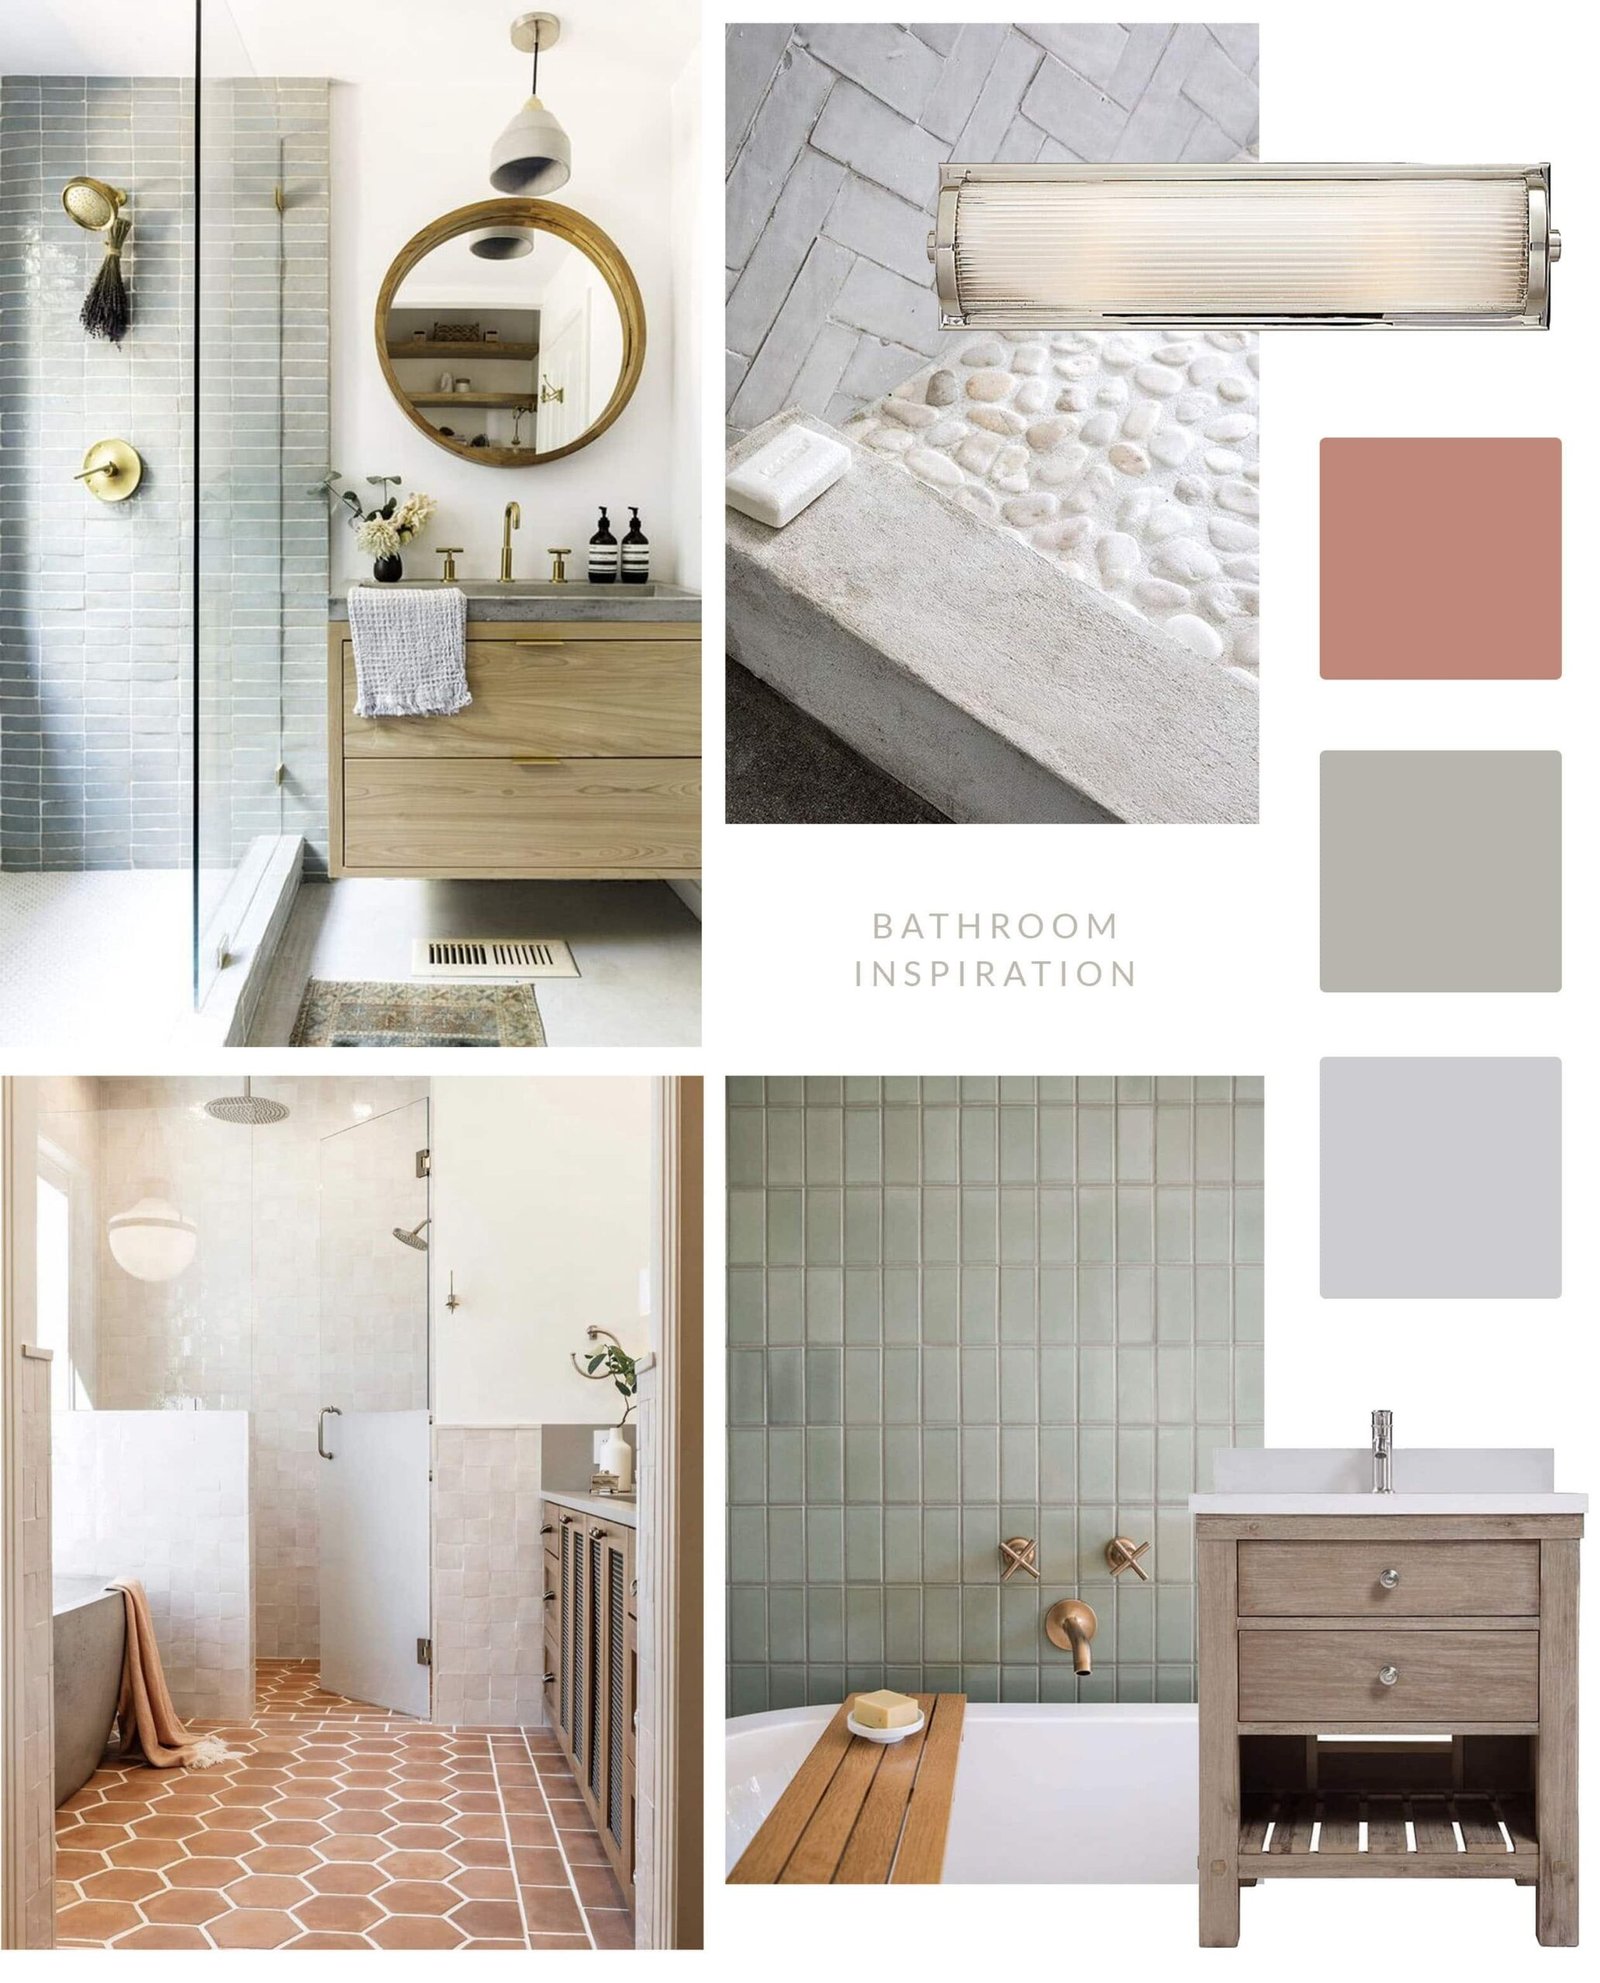
With the tile staying put, I shifted my focus to design inspiration, turning to sources like Pinterest and Photoshop. I needed a visual representation of how various materials could harmonize. Exploring examples like the stunning combinations in the images below helped me envision the final look.
Source: Hearth Studio
Finding the Perfect Aesthetic
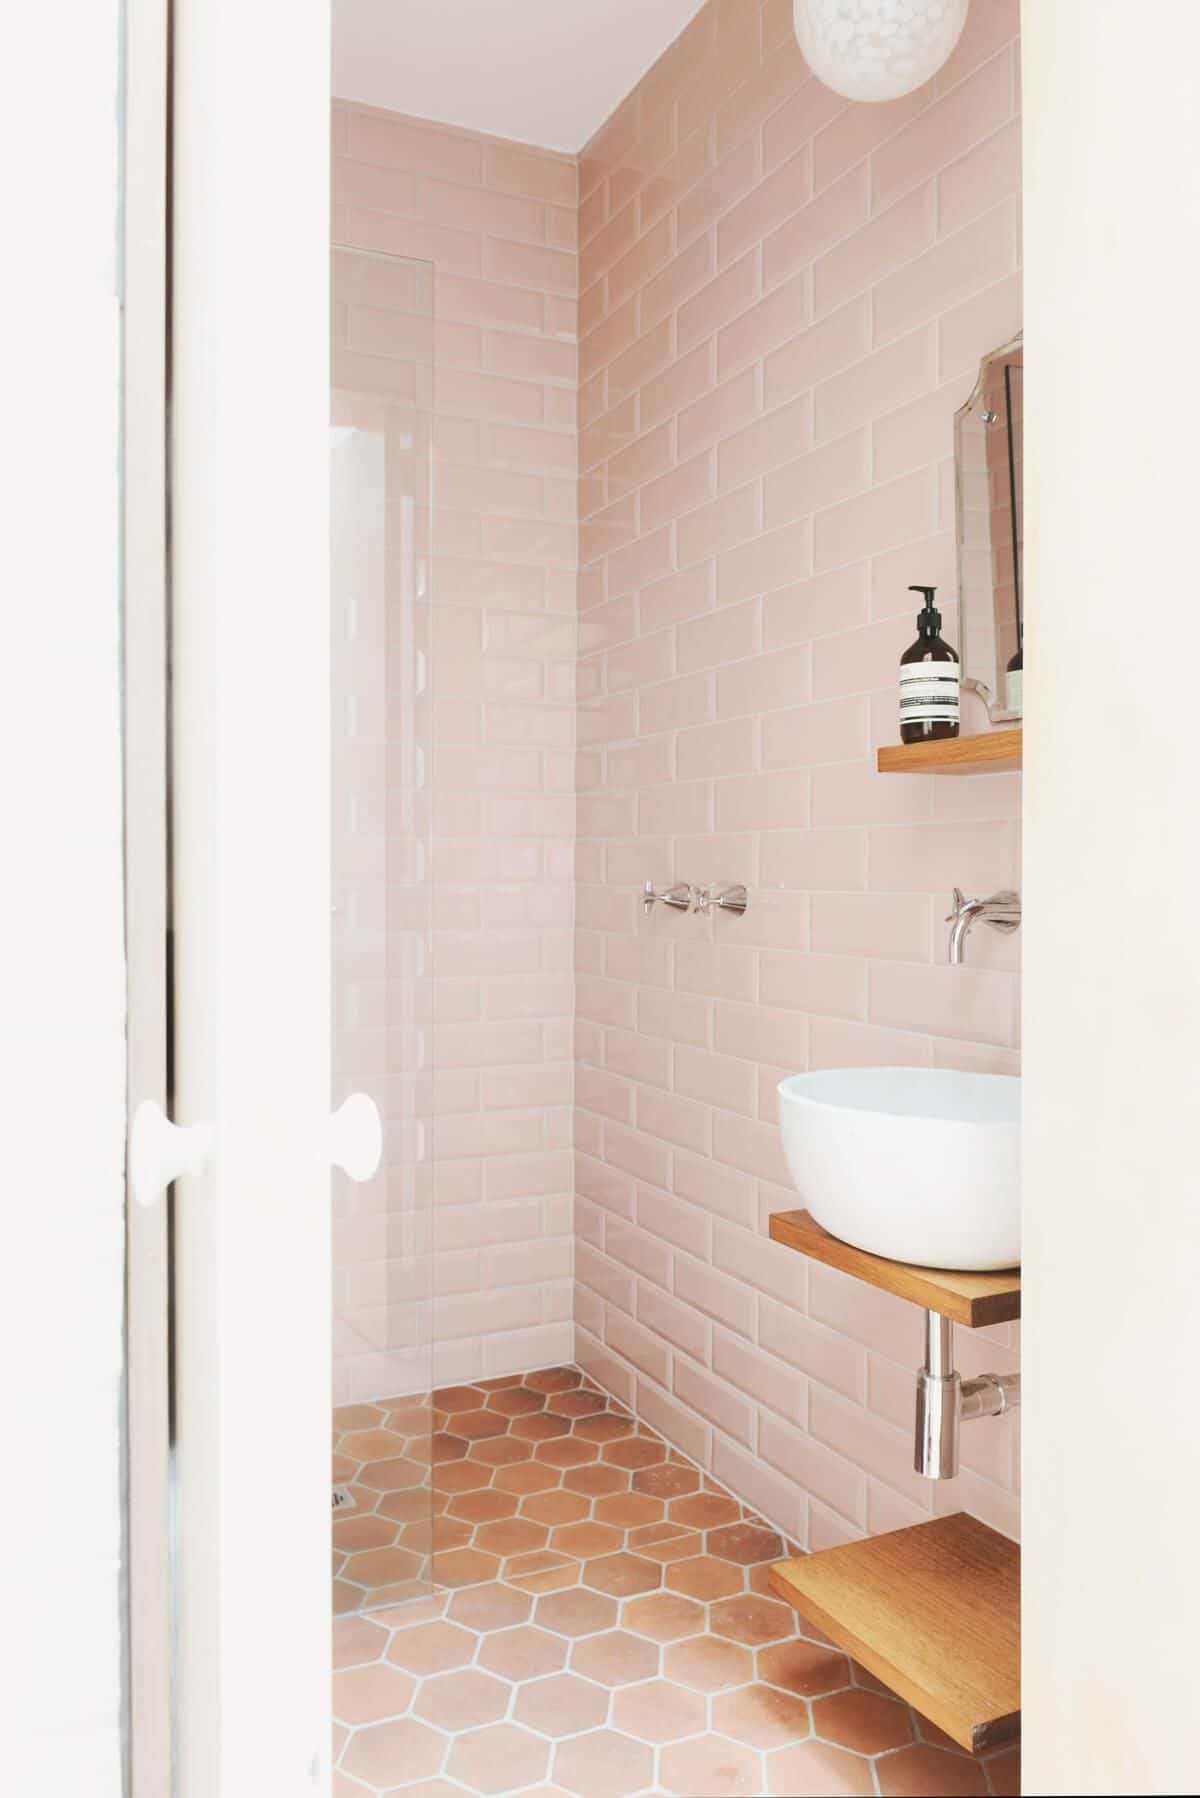
Desiring to balance the strong terra cotta tones of the floor, I sought to incorporate green elements into the design, but the color palette evolved as my vision matured. After examining numerous tile samples and shapes, I created a mood board that helped pinpoint the direction of the style.
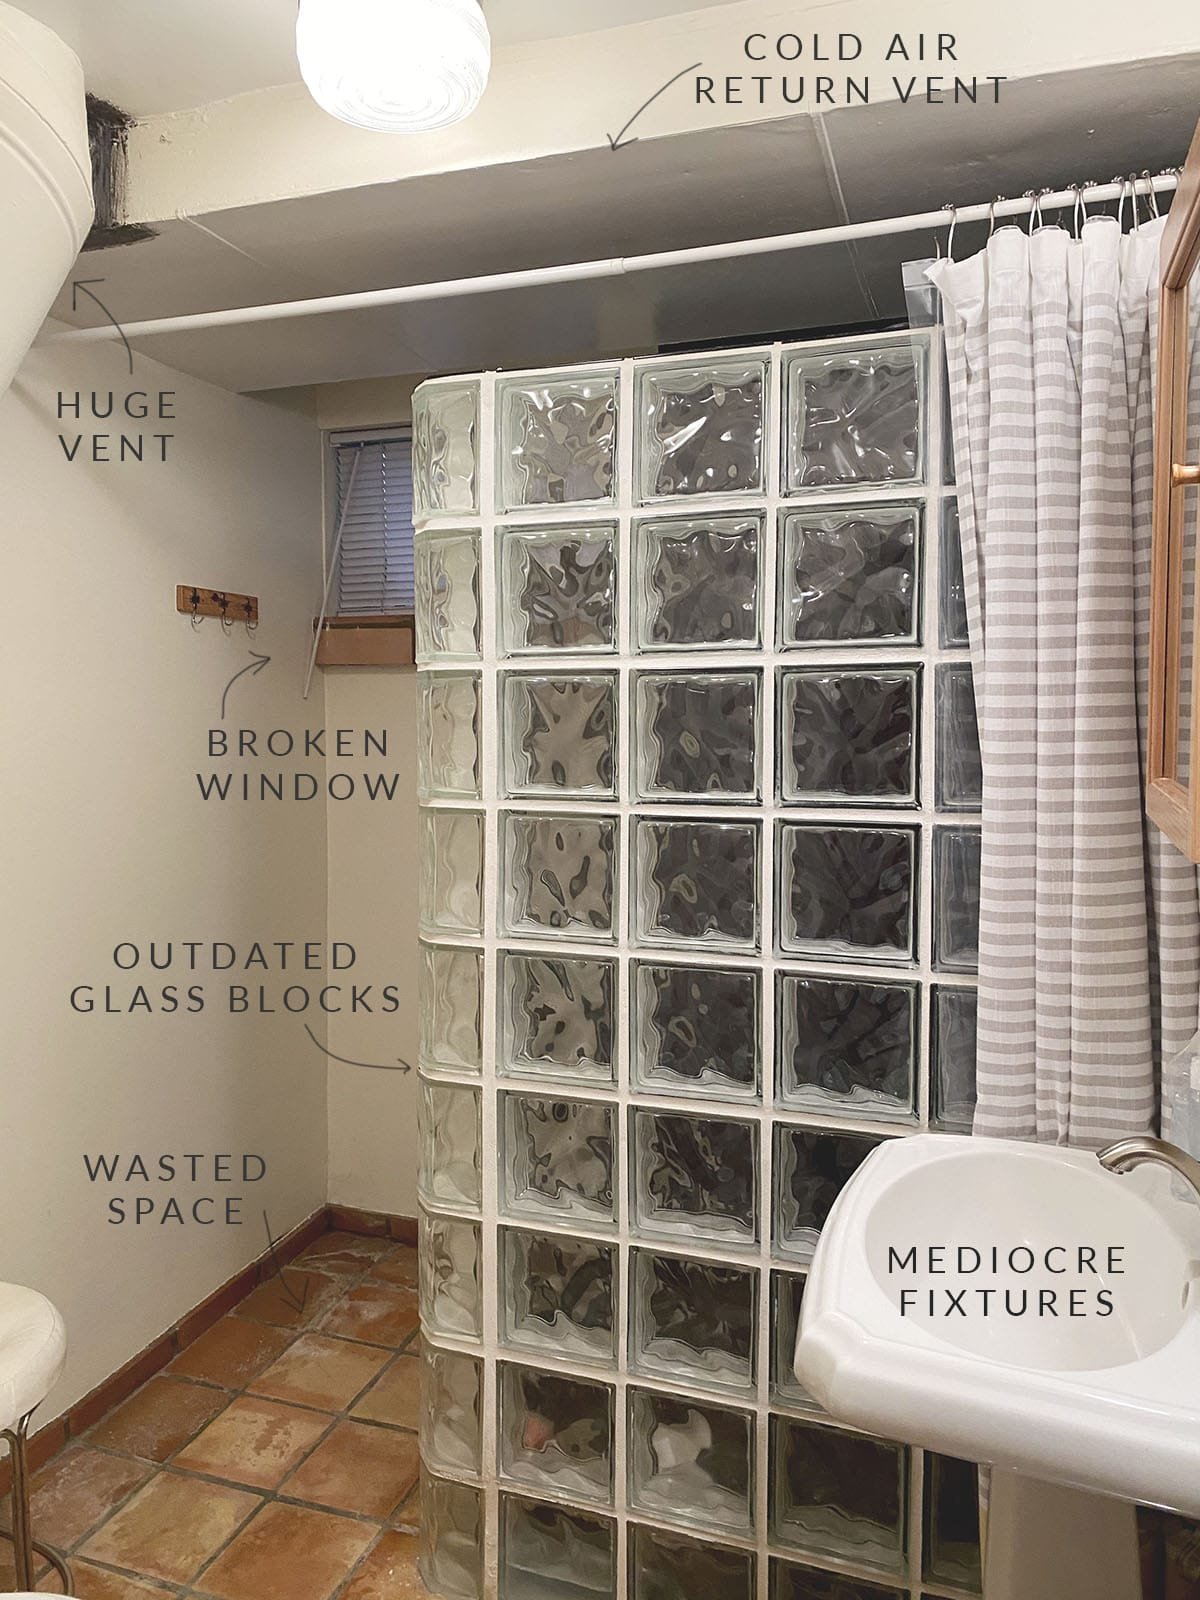
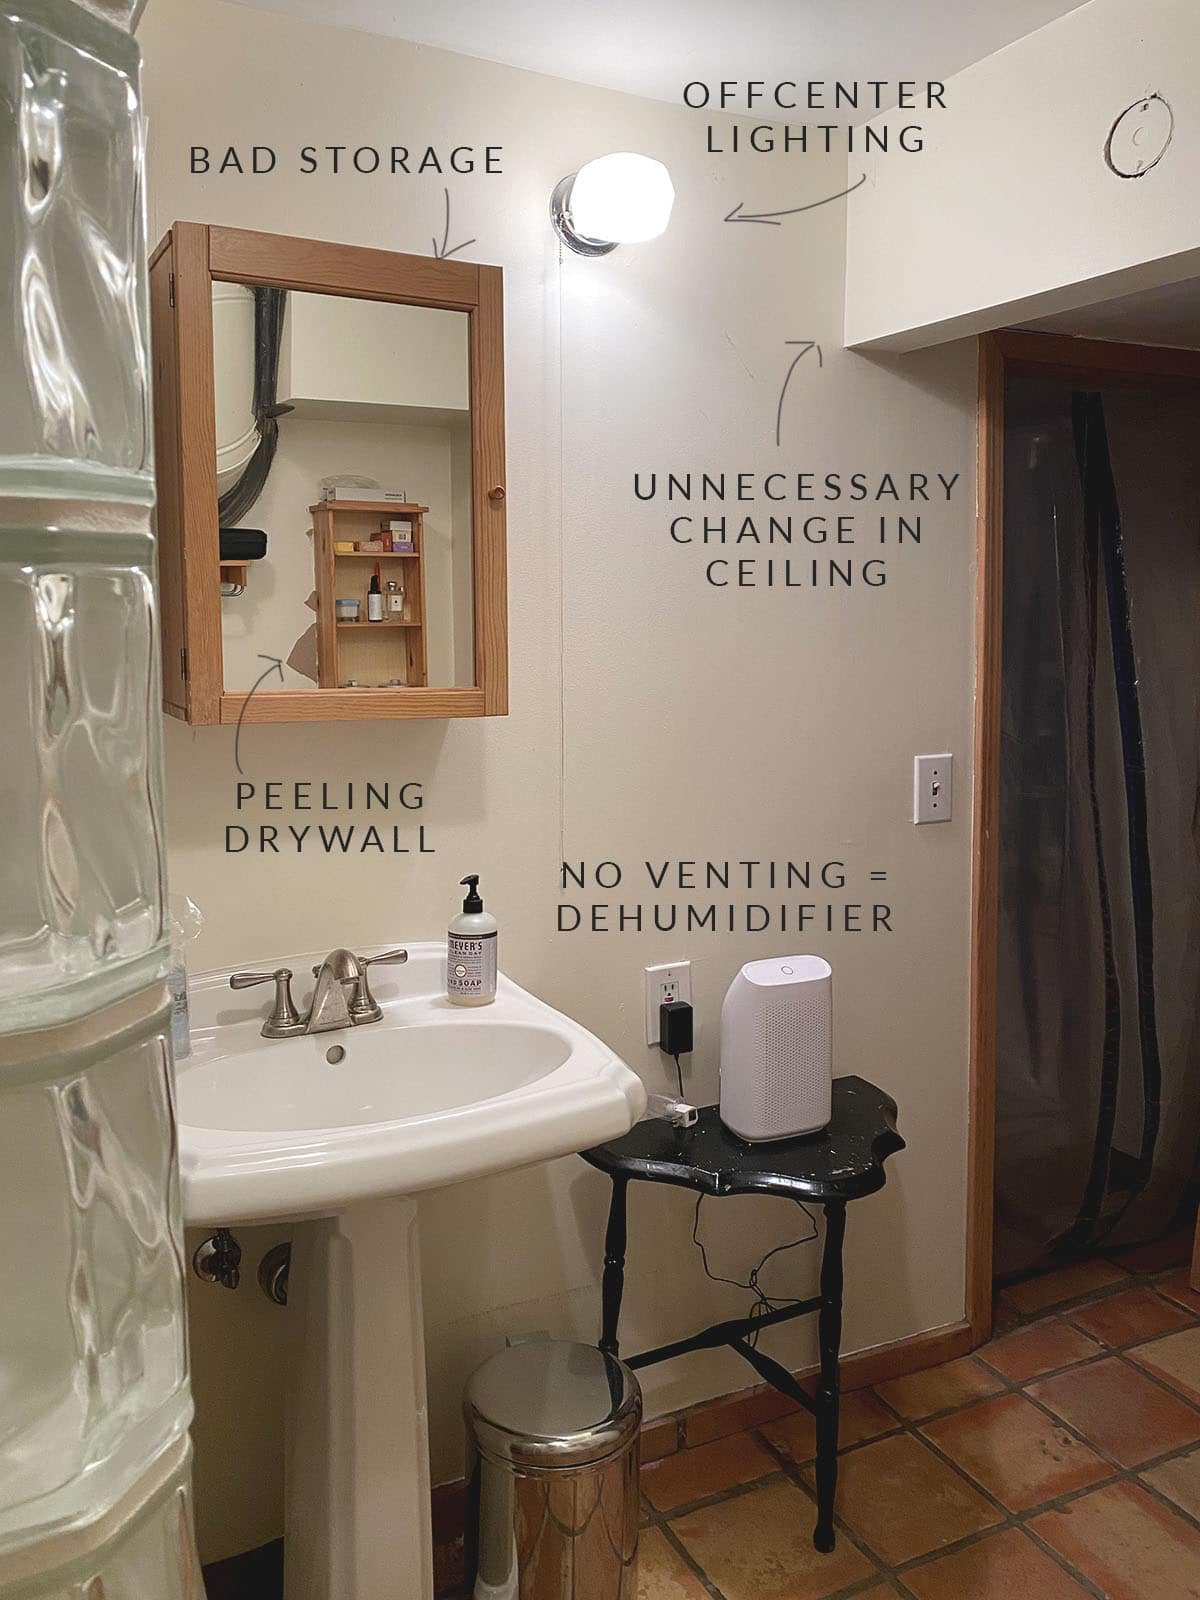
Next, I turned my attention to the actual state of the bathroom, which was nothing short of alarming. Be prepared for a shocking before photo!
Overcoming Design Challenges
The sight of the glass blocks first made my heart sink. They’ve made an unwelcome resurgence in certain modern styles, but they simply weren’t for me. And let’s not forget about the low ceiling heights and protruding vents—all they did was make the bathroom feel like a claustrophobic submarine. Reclaiming vertical space was crucial to making the area feel open and inviting. We needed to remove those drop ceilings and widen open spaces, as even minor adjustments can yield significant improvements in flow and functionality.
But beyond aesthetics, our primary motivation for this renovation was a more serious concern: leaks. Upon discovering damp wood and other issues during demolition, we realized that water damage was prevalent, leading us to make this remodel a necessary investment in health and safety.
Reimagining the Shower: A Point of Inspiration
Initially, I considered a straightforward approach with all-white fixtures—a safe choice that ultimately felt too uninspired. Instead, embracing a Mediterranean vibe led me to explore more adventurous options. After much deliberation on tiles, the distinct star and cross motif from Fireclay Tile piqued my interest. This seemed like the perfect way to add visual interest while keeping the design clean.
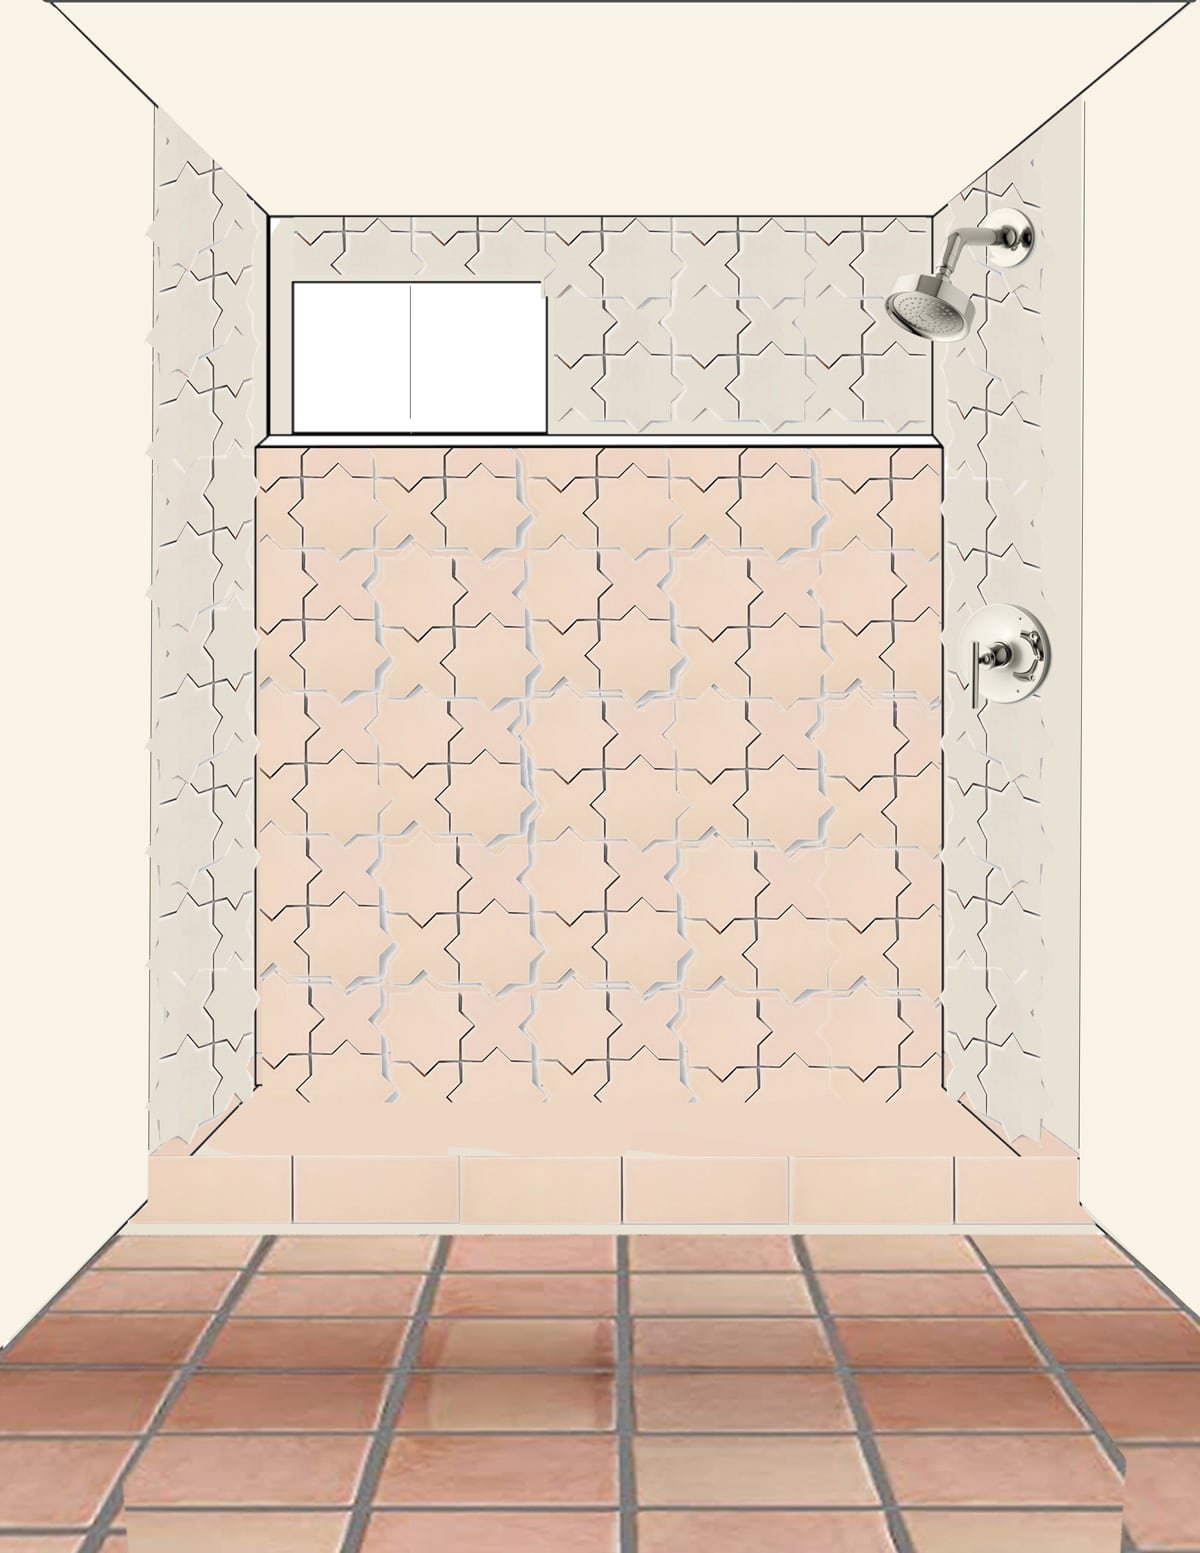
Creating an amateur rendering in Photoshop helped to visualize how the colors and tiles would blend. Opting for a tonal palette with a soft peachy-pink named Tumbleweed and a creamy white called Feldspar allowed me to harmonize the space beautifully while addressing my design constraints. By maintaining a seamless transition from floor to wall, I aimed to enhance the overall visual flow.
Curated Elements: Bringing It All Together
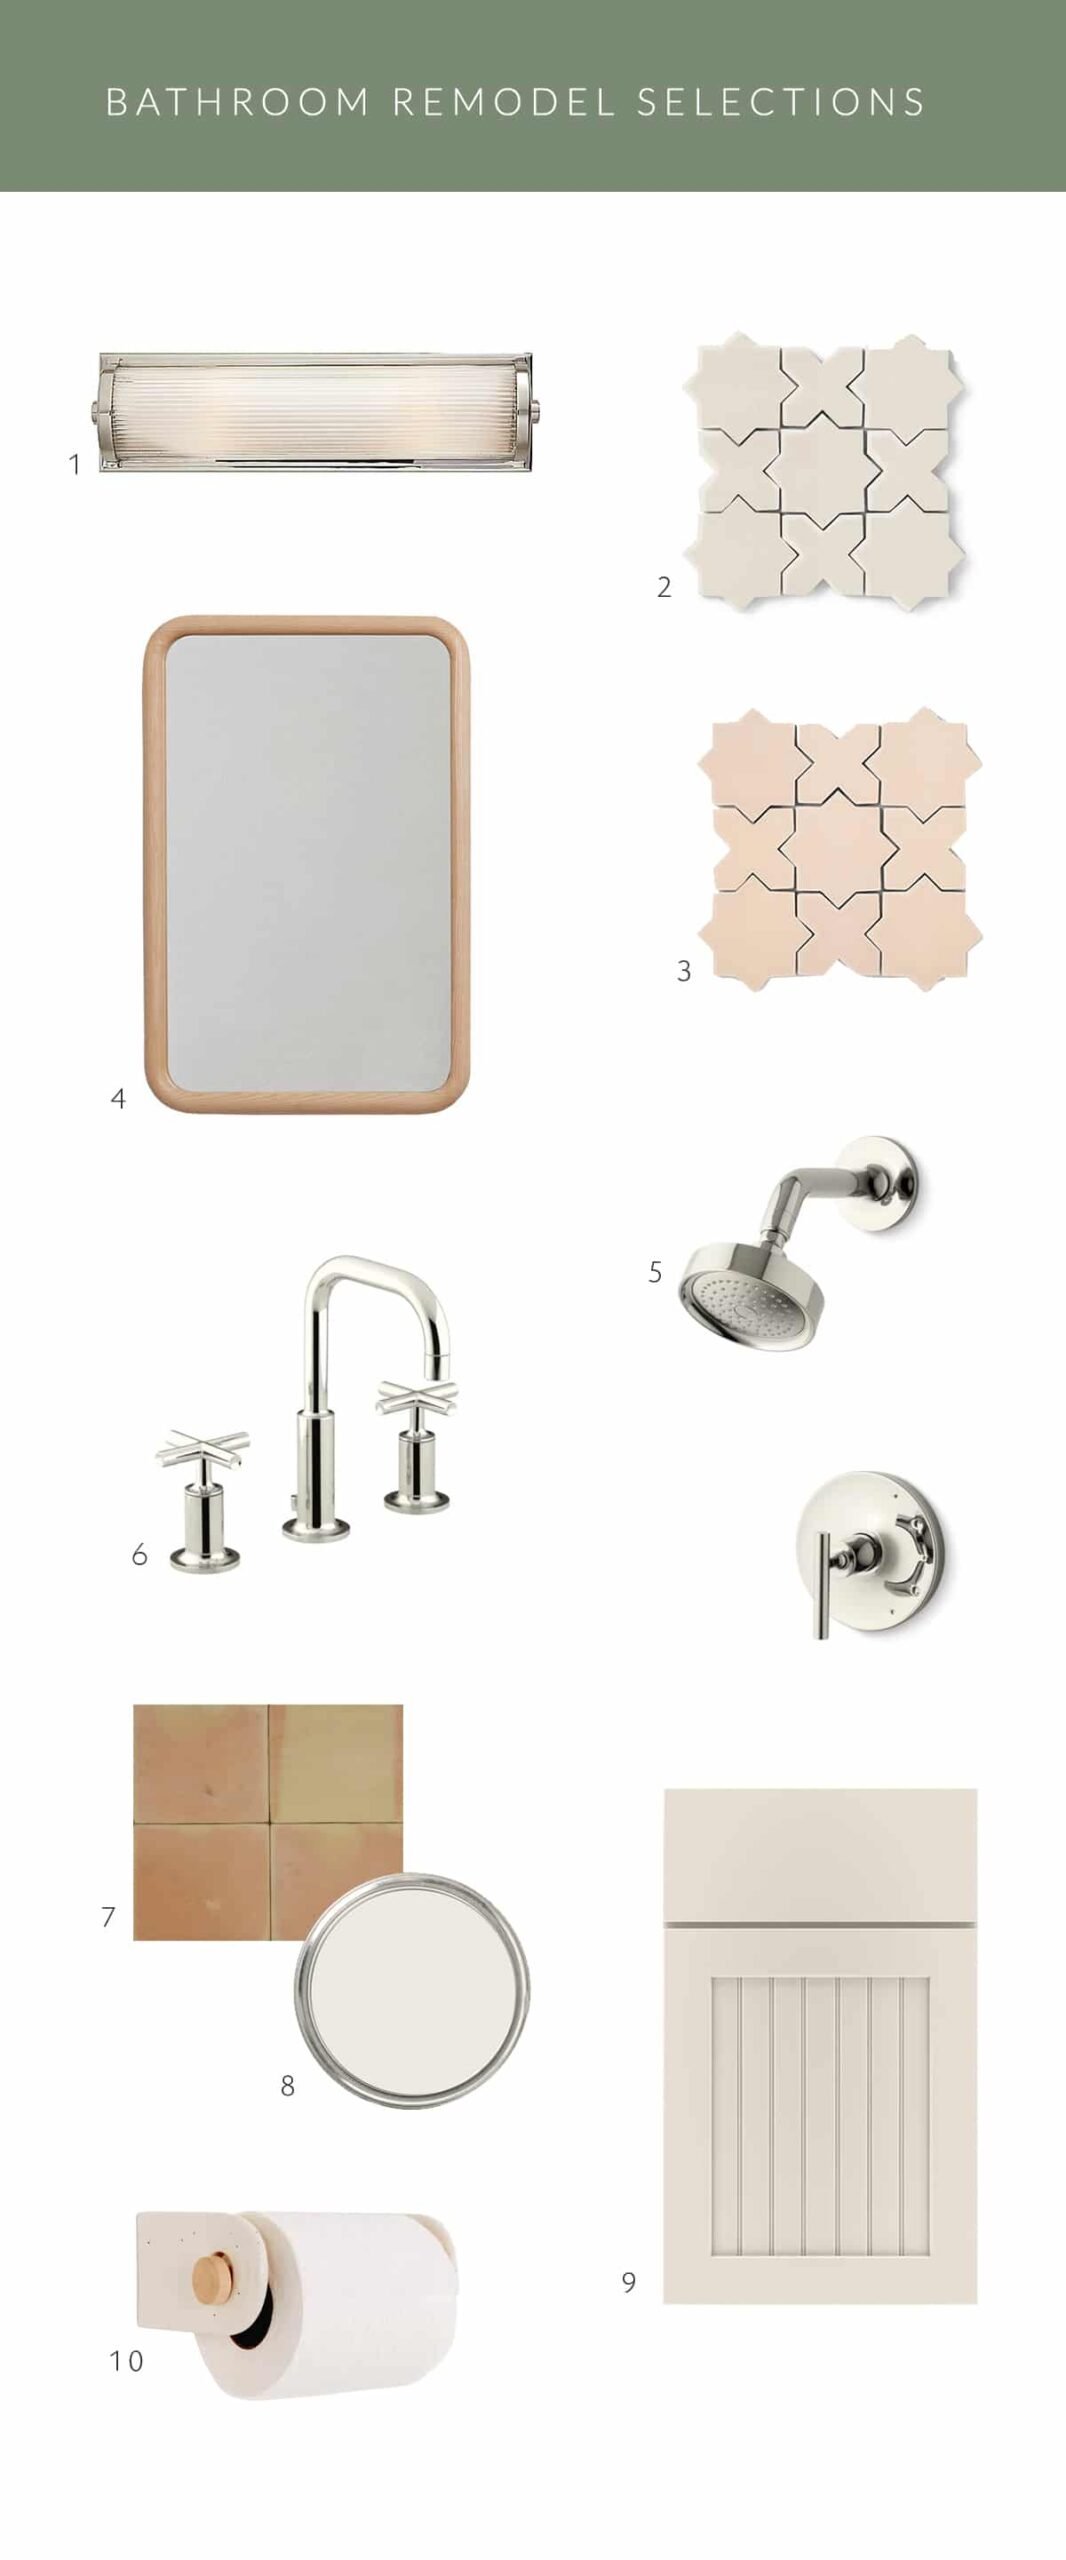
1. ‘Dresser’ Wall Sconce in Polished Nickel | 2. Fireclay tile in Feldspar | 3. Fireclay tile in Tumbleweed | 4. OWL oak mirror | 5. Kohler Purist shower set | 6. Kohler Purist faucet | 7. Current Saltillo tile | 8. ‘Marshmallow’ Paint by Sherwin-Williams | 9. Custom vanity from Masterbrand Cabinets Diamond line | 10. Ceramic toilet paper holder
Aiming for a blend of modern elegance and natural warmth, I also opted for polished nickel finishes to complement the kitchen. This continuity created a cohesive feel. The limited space for a vanity was transformed into an opportunity when Masterbrand Cabinets crafted a custom piece that shared stylistic elements with our kitchen—a delightful unification in design. I even incorporated a classic sconce I had adored for ages, paired with a simple wood mirror, which was a challenge to find in the right size!
Wrapping Up the Design Process
Once we moved past the decision-making stage, progress accelerated swiftly. We are on the cusp of completing this transformation, and I’m eager to share the final reveal with you. Stay tuned for a more in-depth look at the practical changes we implemented and further insights into how we navigated this renovation journey.
Editorial Board
Elma B. Mailler
Senior Curator | Arteresting.net